1. Introduction to No-Bake Chocolate Lasagna
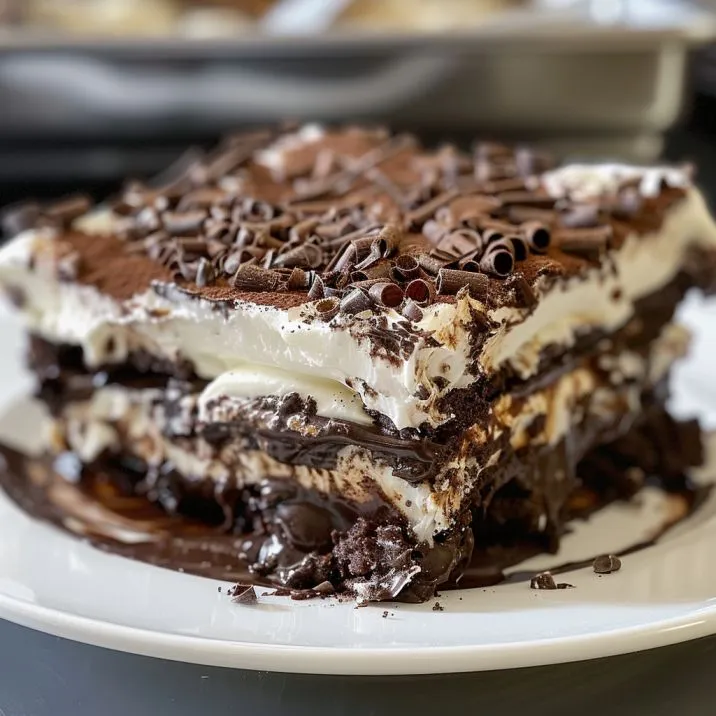
f you’re searching for an indulgent dessert that’s as easy to make as it is delicious, look no further than No-Bake Chocolate Lasagna! This crowd-pleasing recipe layers rich, creamy flavors and textures into one show-stopping dessert without ever needing to turn on your oven. Perfect for potlucks, family gatherings, or just a treat-yourself moment, this dessert combines a crunchy chocolate crust, velvety layers of cream cheese, pudding, and whipped topping, all crowned with chocolate shavings or sprinkles.
No-bake desserts are a lifesaver when you’re short on time but still want to impress. With simple ingredients and minimal effort, No-Bake Chocolate Lasagna is a winning choice for chocolate lovers everywhere. Keep reading for step-by-step instructions, tips for perfect layers, and creative variations to make this dessert your own!
2. Key Ingredients for No-Bake Chocolate Lasagna
To create the perfect No-Bake Chocolate Lasagna, you’ll need a handful of simple, easy-to-find ingredients. Each layer brings its own unique flavor and texture, making this dessert irresistibly delicious. Here are the key ingredients you’ll need:
- Chocolate Sandwich Cookies
These form the crunchy base of your lasagna. Crush them into fine crumbs to create a rich and flavorful crust. - Butter
Melted butter binds the cookie crumbs together, creating a sturdy foundation for your dessert. - Cream Cheese
Softened cream cheese adds a creamy, tangy layer that balances the sweetness. - Powdered Sugar
Sweeten your cream cheese mixture with powdered sugar for a smooth and luscious consistency. - Whipped Topping (Cool Whip)
Light and fluffy whipped topping is essential for that airy texture in multiple layers of the lasagna. - Chocolate Pudding Mix
Choose your favorite instant chocolate pudding mix to provide the rich chocolatey goodness in this dessert. - Milk
You’ll need milk to prepare the pudding layer. Stick to full-fat or 2% milk for the best results. - Chocolate Shavings or Chips
Finish off your chocolate lasagna with a sprinkle of chocolate shavings, chips, or sprinkles for a decorative and delicious touch.
These simple ingredients come together to create a dessert that’s sure to impress. Ready to start layering? Let’s dive into the step-by-step process!
3. Kitchen Essentials for No-Bake Chocolate Lasagna
Preparing No-Bake Chocolate Lasagna is a breeze when you have the right tools at hand. Here’s a list of kitchen essentials you’ll need to create this creamy, chocolatey dessert:
- Mixing Bowls
You’ll need a few mixing bowls for preparing the cream cheese layer, pudding layer, and whipped topping. - Hand Mixer or Stand Mixer
A mixer makes it easy to blend the cream cheese and powdered sugar into a smooth and creamy consistency. - Measuring Cups and Spoons
Accurate measurements are key for perfectly balanced flavors in each layer. - Rolling Pin or Food Processor
Use to crush the chocolate sandwich cookies into fine crumbs for the crust. - 9×13-Inch Baking Dish
A rectangular dish is ideal for assembling and serving your chocolate lasagna. Transparent dishes work well to show off the beautiful layers. - Rubber Spatula or Spoon
A spatula helps spread each layer evenly for a neat and tidy presentation. - Refrigerator
Since this is a no-bake dessert, your refrigerator does the hard work by setting each layer to perfection. - Grater or Peeler (Optional)
If you’re topping your lasagna with chocolate shavings, a grater or vegetable peeler will help you create elegant finishing touches.
Having these essentials on hand ensures a smooth and stress-free preparation process. With your tools ready, it’s time to layer up this no-bake masterpiece!
4. Step-by-Step Recipe
Creating a No-Bake Chocolate Lasagna is simple and fun! Follow these easy steps to layer your way to a dessert everyone will love.
1: Prepare the Cookie Crust
- Crush the Cookies
Place chocolate sandwich cookies in a food processor and pulse until they turn into fine crumbs. Alternatively, place them in a resealable bag and crush with a rolling pin. - Mix with Butter
Combine the cookie crumbs with melted butter in a mixing bowl. Stir until evenly coated. - Press into the Pan
Press the mixture firmly into the bottom of a 9×13-inch baking dish to form the crust. Place the dish in the refrigerator to chill while preparing the next layer.
2: Make the Cream Cheese Layer
- Blend Ingredients
In a mixing bowl, use a hand mixer to beat softened cream cheese until smooth. Add powdered sugar and 1 cup of whipped topping, mixing until creamy. - Spread Over Crust
Gently spread the cream cheese mixture over the chilled crust, ensuring an even layer.
3: Prepare the Pudding Layer
- Mix the Pudding
In another bowl, whisk the chocolate pudding mix with cold milk until it thickens (about 2-3 minutes). - Layer the Pudding
Pour the pudding over the cream cheese layer and spread evenly.
4: Add Whipped Topping
Spread the remaining whipped topping over the pudding layer, smoothing it out to cover the dessert completely.
5: Decorate
Sprinkle chocolate shavings, mini chocolate chips, or your favorite toppings over the whipped topping for a decorative finish.
6: Chill and Serve
Place the dish in the refrigerator for at least 4 hours (or overnight) to allow the layers to set properly. Slice into squares and serve chilled for the best texture and flavor.
This no-bake dessert is perfect for any occasion. Enjoy the creamy layers and rich chocolatey goodness in every bite!
5. Common Mistakes to Avoid
8. FAQs
How long does it take to prepare?
Preparation takes about 20 minutes, with at least 4 hours of chilling time.
Can I make it ahead of time?
Absolutely! Prepare it a day in advance and store it in the refrigerator.
How do I prevent soggy layers?
Refrigerate the cookie base before adding layers to ensure firmness.
What substitutions can I use?
Try mascarpone instead of cream cheese or almond milk for a dairy-free version.
Is it suitable for children?
Yes, it’s kid-friendly and can be customized with their favorite toppings.
Can I use homemade pudding?
Yes, homemade pudding adds a rich, personalized touch.
9. Conclusion: Why You’ll Love No-Bake Chocolate Lasagna
No-Bake Chocolate Lasagna is the ultimate dessert for anyone seeking a simple yet stunning treat that satisfies every chocolate craving. With its layers of crunchy crust, creamy fillings, and rich chocolate flavor, this dessert is a guaranteed crowd-pleaser for any occasion. Whether you’re hosting a party, treating your family, or enjoying a quiet night in, this no-bake masterpiece delivers indulgence with minimal effort.
What makes it even better? It’s endlessly versatile, allowing you to customize flavors and toppings to suit your preferences or the season. From peanut butter twists to festive holiday variations, the possibilities are endless.
Now that you’ve learned how to make No-Bake Chocolate Lasagna, it’s time to put on your apron and create this delectable dessert. Share your version with friends and family—they’ll be begging for the recipe! Don’t forget to bookmark this guide for future inspiration and dessert success. Happy layering!
Print
No Bake Chocolate Lasagna
- Total Time: 4 hours (including chilling)
- Yield: 9 servings 1x
- Diet: Vegetarian
Description
Indulge in the rich, creamy layers of our No-Bake Chocolate Lasagna! This dessert combines chocolate pudding, whipped topping, and a crunchy crust for a decadent treat that’s easy to prepare and perfect for any occasion.
Ingredients
- 1 package (8 oz) cream cheese, softened
- 2 cups heavy cream
- 1/4 cup powdered sugar
- 1 cup chocolate pudding mix (instant)
- 1 1/2 cups milk
- 1 package (8 oz) Cool Whip or whipped topping
- 1 1/2 cups crushed chocolate sandwich cookies (like Oreos)
- 1/4 cup unsalted butter, melted
- 2 cups mini chocolate chips (for topping)
Instructions
- In a mixing bowl, beat the softened cream cheese until smooth. Add powdered sugar and mix well.
- In another bowl, whisk together the chocolate pudding mix and milk until thickened.
- Fold the pudding into the cream cheese mixture, then fold in the Cool Whip until smooth.
- In a separate bowl, combine crushed chocolate cookies and melted butter to create the crust.
- Layer half of the cookie crust in a 9×9-inch pan. Spread half of the chocolate filling over the crust. Repeat the layers.
- Sprinkle mini chocolate chips over the top. Refrigerate for at least 4 hours or overnight to set.
- Serve chilled and enjoy!
Notes
- For a deeper chocolate flavor, use dark chocolate pudding mix.
- You can customize the crust using different types of cookies like mint Oreos for added flavor.
- Prep Time: 20 minutes
- Cook Time: 00 minutes
- Category: Desserts
- Method: No-Bake
- Cuisine: American
Nutrition
- Calories: 350
- Sugar: 25g
- Sodium: 200mg
- Fat: 20g
- Saturated Fat: 12g
- Carbohydrates: 38g
- Fiber: 2g
- Protein: 6g
- Cholesterol: 50mg
